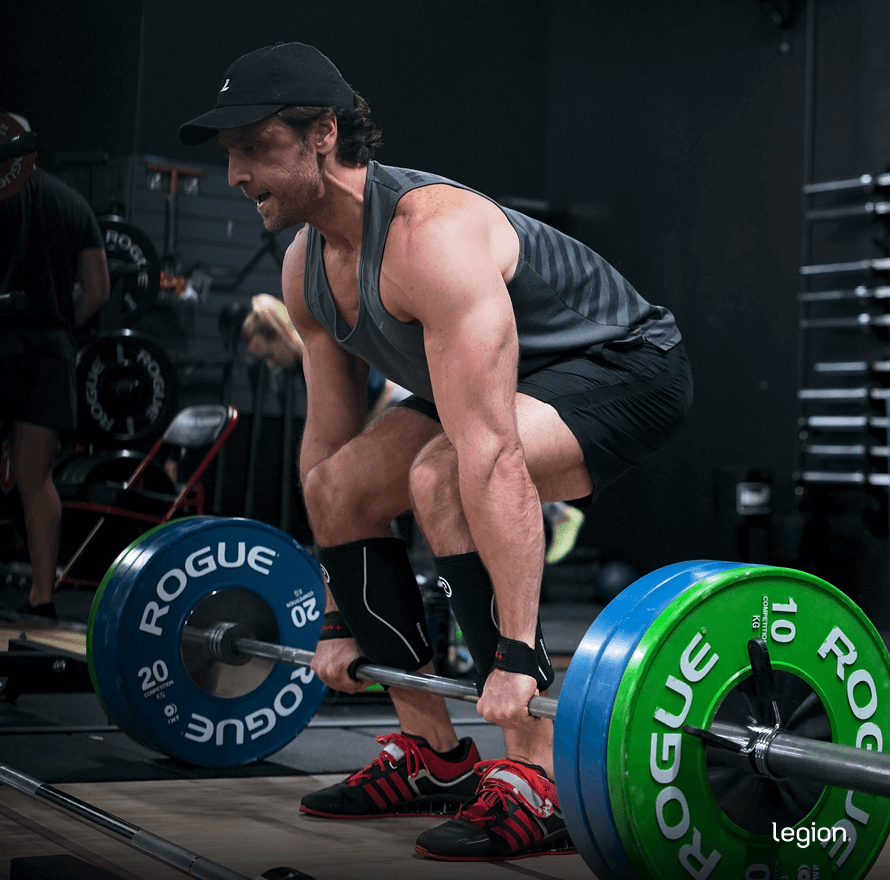
The deadlift is one of the single best exercises for building almost every major muscle group in your body, including your back, hamstrings, glutes, quads, and forearms, if you do it correctly.
Luckily, learning proper deadlift form is simple.
You just have to learn a few simple habits and remember a handful of effective cues on how to deadlift properly, and you’ll be pulling like a pro in no time.
The conventional barbell deadlift is the most common and highly regarded kind of deadlift, but the sumo deadlift, Romanian deadlift, and trap-bar deadlift can be equally effective.
Whether you’re just starting out and want to learn how to deadlift from scratch or you’re a seasoned weightlifter looking to burnish your deadlift form, this article is for you.
Table of Contents
Proper Deadlift Form 101
Deadlifting with sloppy form is a surefire way to wind up injured.
Use correct deadlift form, however, and you’ll be able to use one of the most effective full-body exercises there is without banjaxing your back.
That’s why it’s imperative that you learn how to deadlift properly.
Let’s break down everything you need to know about proper deadlift form.
Step 1: Set Up
Load a barbell with one 45-pound plate on either side (this ensures the bar is the proper height off the floor, but you’ll want to add more weight as needed).
Walk up to the bar, position your feet so your heels are about six inches apart with your toes pointed slightly out, and move the bar about an inch from your shins.
Bend over and grab the bar with a double-overhand grip (both palms facing down) just outside your shins. Take a deep breath of air into your belly (as opposed to your chest), bracing your abs as if you were about to get punched in the stomach.
Flatten your back by pushing your hips up, wedging yourself into what’s essentially a “half-squat” position. Pull your shoulder blades “back and down” and push your upper arms into your sides (a good cue for this is to “crush oranges in your armpits”).
You should feel considerable tightness in your hamstrings and hips as you get into this position. This is desirable because as soon as your hips rise, your shoulders will be able to follow, and the weight will immediately start coming off the floor.
Here’s how you should look:
Step 2: Ascent
Squeeze the bar as hard as you can and pull it straight up.
As you pull, think about forcefully driving your body upward and slightly back, onto your heels. Push through your heels, and keep your elbows locked in place and lower-back slightly arched (no rounding!).
Your hips and shoulders should rise simultaneously. Don’t shoot your hips up and then use your back like a lever to raise your shoulders.
Try to keep the bar on as vertically straight of a path as possible because any deviations are just going to slow you down and make it harder to maintain good form. The bar shouldn’t move noticeably toward or away from you.
Once the bar rolls over your knees, push your hips into the bar. As it begins to move up your thighs, you’ll feel your hamstrings and hips working hard as you continue to stand.
At the top, your chest should be up and your shoulders down. Don’t lean back, hyperextend your lower-back, or shrug the weight up.
Here’s how this movement looks:
Step 3: Descent
While keeping your back flat and your core tight, reverse the movement to return the bar to its starting position on the floor. This is basically a mirror image of what you did during the ascent.
Let the bar slide straight down your thighs while letting your hips move backward until the bar has cleared your knees, and then drop it to the floor.
Don’t try to lower the bar slowly or quietly. The entire descent should take one to two seconds or less. Take a moment to get in the proper starting position, then start your next rep.
Here’s what this movement looks like:

You’re now ready to reset and begin the next rep.


My Top 5 Deadlift Technique Tips
Tip 1: “Crush oranges in your armpits.”
While you get set up, imagine there’s an orange wedged under each of your armpits, and you’re trying to squeeze the juice out of both of them.
This will . . .
- Ensure your shoulders are in the right starting position, which helps you lift more weight and maintain consistent form from one repetition to the next.
- Help prevent your upper-back from rounding (which reduces the likelihood of your lower-back rounding).
- Help you get your entire body into the proper position before you pull, which helps you lift more weight.
Tip 2: “Push your butt back.”
After you’ve got your feet in the correct position and you’ve grabbed the bar, think about pushing your butt out and back behind you.
This will . . .
- Flatten your back, which reduces your risk of injury and helps you lift more weight.
- Ensure your hips are at the appropriate height when you begin each repetition, which saves energy and thus helps you lift more weight.
Tip 3: “Drag the bar up your legs.”
One of the most common mistakes people make when deadlifting is letting the bar drift forward several inches in front of their shins, which wastes energy and increases the likelihood of rounding their back.
Keeping the bar as close to the front of your legs as possible solves this problem. Thus, the cue “draft the bar up your legs” . . .
- Reduces the distance the bar has to travel and makes it easier to maintain a straight back.
- Helps you lift more weight by ensuring you don’t move the bar further than you have to.
Tip 4: Reset after each rep.
Bouncing the weight off the floor at the bottom of the deadlift (as opposed to fully stopping and resetting) allows you to lift more weight and get more reps, but only because it makes the exercise easier.
Resetting between each rep helps you learn and ingrain better technique, and it gives you a better idea of how much you can truly lift.
Tip 5: Use the Valsalva maneuver.
The Valsalva maneuver is the process of forcefully breathing out against a closed windpipe.
Specifically, you try to breathe out while keeping your glottis (the space between your vocal cords) closed.
This technique traps air in your lungs and creates pressure inside your abdomen, known as “intra-abdominal pressure,” which helps stabilize your body, keep your torso rigid, and helps you lift more weight.
If you want to learn more about the Valsalva maneuver, read this article:
The Complete Guide to the Valsalva Maneuver
The 6 Best Deadlift Form Variations
Variation 1: Sumo Deadlift
In the sumo deadlift you take a stance that’s about twice as wide as you would for a conventional deadlift. This means your toes point outward more, your grip is closer together, and your hips are closer to the bar when you begin the movement.
Some people say the sumo deadlift is easier than the conventional deadlift because the bar travels about 20% less during the sumo deadlift, but studies show muscle activation during both is very similar. The only small difference is the sumo deadlift trains your quads slightly more, while the conventional deadlift places more strain on your back muscles.
The conventional deadlift tends to be easier to learn for most people, which is why I recommend you start with a conventional stance. If you find the conventional deadlift uncomfortable after a few months of lifting or just want to mix up your training, though, the sumo deadlift is a fine alternative.
Variation 2: Trap-Bar Deadlift
The trap-bar—or hex-bar—deadlift is the same as the conventional deadlift except it’s performed with a trap bar.
Because you step inside a trap bar to lift it, it’s easier to balance the weight over your center of gravity, which makes the trap-bar deadlift more comfortable and easier to learn than the conventional deadlift for a lot of people.
It’s also slightly safer than other deadlift variations because it reduces the risk of biceps tears and hyperextending your back, it allows you to lift around 5 to 10% more than you can with a barbell deadlift, and it may be slightly better for improving athletic performance than the barbell deadlift.
Variation 3: Romanian Deadlift (RDL)
The Romanian deadlift—or RDL—is similar to the conventional barbell deadlift, except your legs stay straighter, bending only slightly at the knees as you lower the bar. You also only lower the bar to just below your knees or about mid-shin before standing up again (not all the way to the ground).
This puts a larger emphasis on your hamstrings and glutes rather than your back. It’s also considerably less fatiguing than the conventional deadlift, which means you can do it more often without wearing yourself to a frazzle.
Variation 4: Stiff-Leg Deadlift
The stiff-leg deadlift is more or less identical to the Romanian deadlift except the bar starts and finishes each rep on the floor. This means the stiff-leg deadlift requires greater hip mobility and hamstring flexibility than the Romanian deadlift.
Most people also can’t pull as much weight using the stiff-leg deadlift as they can with other deadlift variations, and it can be harder to learn for beginners. This is why I recommend that most people stick with the Romanian deadlift instead of the stiff-leg deadlift.
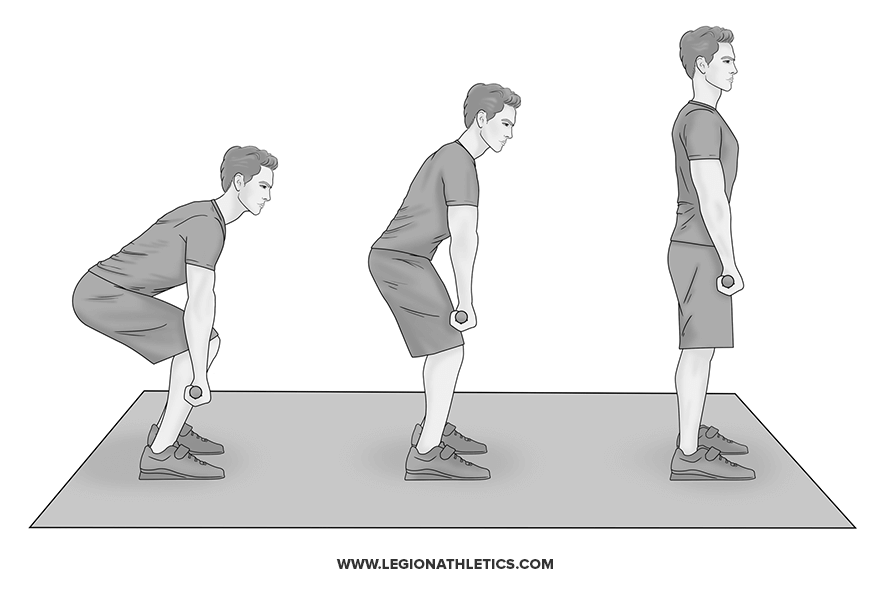
Variation 5: Dumbbell Deadlift
The dumbbell deadlift is more or less the same movement as the conventional barbell deadlift, except you use a pair of dumbbells instead of a barbell.
The biggest downside of using dumbbells to deadlift is that they limit the amount of weight you can pull. What’s more, because they move independently, it can be difficult to keep them moving in a straight vertical line during each rep. For these reasons you should really only use the dumbbell deadlift if you don’t have access to a barbell.
FAQ #1: What should the average person be able to deadlift?
It’s very difficult to say exactly what “average” is, because how much you can lift is greatly affected by how much you weigh, your experience level, and whether you’re a man or a woman.
For example, the average 200-pound man with five years of weightlifting experience can lift considerably more than the average 100-pound man who’s only just started weight training.
So, if you’re just starting out, try not to focus on how your numbers compare to other people. Focus on learning proper deadlift form and getting stronger than you were the previous week, month, or year. In other words, compete against yourself and not the ruck of other deadlifters.
That said if you’re still curious how your numbers stack up against other people who are similar to you or you just want a milestone to shoot for, check out the deadlift strength standards in this article:
These Are the Best Strength Standards on the Internet
FAQ #2: How do I know if I am deadlifting correctly?
You can read about deadlift technique until you’re blue in the face, but that doesn’t mean you’ll use correct deadlift form when it comes time to pull a heavy barbell off the ground.
The best way to know you’re using proper deadlift form in the gym is to have someone take a video of you. You can critique the video on your own or with someone you trust, identify areas of your technique that need improvement, and make any necessary adjustments.
You may also benefit from visualizing perfect deadlift form or re-reading this article immediately before your next deadlift workout.
If you want to get into the minutia of deadlift technique, I recommend reading Starting Strength. You’d be hard pressed to find a more detailed and comprehensive explanation of how to deadlift properly.
FAQ #3: Do deadlifts build muscle?
Yes!
Most people consider the deadlift a “back exercise,” but it trains far more than just your back.
In fact, it trains almost every major muscle group in your body, excluding your chest, arms, and shoulders.
Specifically, studies show it helps develop your . . .
- Latissimus dorsi
- Trapezius
- Erector spinae
- Glutes
- Hip flexors
- Calves
- Quadriceps
- Forearms
This is why the deadlift has long been considered one of the best ways to build whole-body strength and muscularity.
+ Scientific References
- Martín-Fuentes, I., Oliva-Lozano, J. M., & Muyor, J. M. (2020). Electromyographic activity in deadlift exercise and its variants. A systematic review. PLoS ONE, 15(2). https://doi.org/10.1371/journal.pone.0229507
- Camara, K. D., Coburn, J. W., Dunnick, D. D., Brown, L. E., Galpin, A. J., & Costa, P. B. (2016). An examination of muscle activation and power characteristics while performing the deadlift exercise with straight and hexagonal barbells. Journal of Strength and Conditioning Research, 30(5), 1183–1188. https://doi.org/10.1519/JSC.0000000000001352
- Swinton, P. A., Stewart, A., Agouris, I., Keogh, J. W. L., & Lloyd, R. (2011). A biomechanical analysis of straight and hexagonal barbell deadlifts using submaximal loads. Journal of Strength and Conditioning Research, 25(7), 2000–2009. https://doi.org/10.1519/JSC.0b013e3181e73f87
- Lake, J., Duncan, F., Jackson, M., & Naworynsky, D. (2017). Effect of a Hexagonal Barbell on the Mechanical Demand of Deadlift Performance. Sports, 5(4), 82. https://doi.org/10.3390/sports5040082
- J Cholewicki, S M McGill, & R W Norman. (n.d.). Lumbar spine loads during the lifting of extremely heavy weights - PubMed. Retrieved April 9, 2021, from https://pubmed.ncbi.nlm.nih.gov/1758295/
- ESCAMILLA, R. F., FRANCISCO, A. C., KAYES, A. V., SPEER, K. P., & MOORMAN, C. T. (2002). An electromyographic analysis of sumo and conventional style deadlifts. Medicine & Science in Sports & Exercise, 34(4), 682–688. https://doi.org/10.1097/00005768-200204000-00019
- Escamilla, R. F., Francisco, A. C., Fleisig, G. S., Barrentine, S. W., Welch, C. M., Kayes, A. V., Speer, K. P., & Andrews, J. R. (2000). A three-dimensional biomechanical analysis of sumo and conventional style deadlifts. Medicine and Science in Sports and Exercise, 32(7), 1265–1275. https://doi.org/10.1097/00005768-200007000-00013