Key Takeaways
- The bent-over row is one of the single best exercises for building a wide, thick, defined back and strong, defined arms.
- The conventional bent-over barbell row is the most popular kind of bent-over row, but the dumbbell bent-over row, Yates row, and standing T-bar bent-over are worthy alternatives.
- I personally like to slot the barbell row in as the second exercise in my pull workouts (after deadlifting) and often follow it up with other less demanding exercises.
Out of all the exercises you can do for your back, my top two are:
- Deadlift
- Bent-over row
In fact, I’d go as far as saying that those two exercises alone can virtually get you to the finish line of a wide, thick, and defined back.
There are a few other exercises that have become staples in my “pull” workouts (pullups, lat pulldowns, and cable rows, mostly), but without a lot of deadlifting and bent-over rowing over the years, I don’t think I would’ve been able to develop this back:

There are a few reasons I like bent-over rows so much:
- They’re easier to recover from than deadlifts, which means you can do more “hard sets” over time without running into symptoms of overtraining.
- They’re easy to progressively overload, which isn’t the case with exercises like pullups (weight belts are a pain to set up).
- They involve almost every major muscle group along the back of the body, including your legs as the weights get heavier.
There’s a kicker, though: you have to know how to do the bent-over row correctly or it becomes far less effective.
Furthermore, there are a few types of bent-over rows that you should know about and incorporate into your workout routines for the best possible results.
And that’s what this article is going to be all about. In it, you’re going to learn everything you need to know about the bent-over row to get the absolute most out of it in your training.
For example, you’re going to learn my three favorite types of bent-over rows, how to do each with flawless technique, and the answers to commonly asked questions like . . .
- Should you always use strict form, only moving your arms?
- Should you use a barbell, dumbbells, or a machine?
- Should you hold the bar with your palms facing behind you in in front of you?
- And more
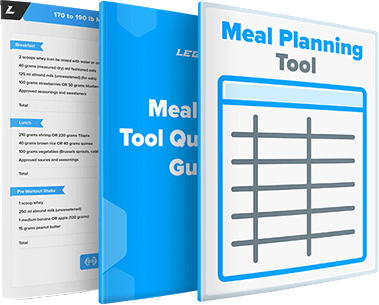
I’m also going to provide you with a simple but effective bent-over row workout that you can start using right away.
Let’s get started!
Table of Contents
What Is the Bent-Over Row?
The bent-over row isn’t a specific exercise so much as a category of exercises that involve bending over at the waist and lifting either a barbell or dumbbell toward your chest.
When people say bent-over row, though, what they’re usually referring to is the classic “barbell row,” which has been a staple in strength and bodybuilding training for decades now.
That said, there are several different other types of bent-over rows that people often do, including Pendlay rows, dumbbell rows, Yates rows, and the T-bar bent-over row, to name a few.
The main differences between these different kinds of rows are the way you grip the bar, what kind of resistance you use (barbell vs dumbbell vs machine), and how strict you are in using your legs to assist the movement.
For the standard barbell row you need a barbell (either the standard 45-pound version or a preloaded one). If you’re using heavier weights, then you’ll also probably want to do the exercise on a padded floor or deadlift platform to make sure you don’t damage the plates or the floor.
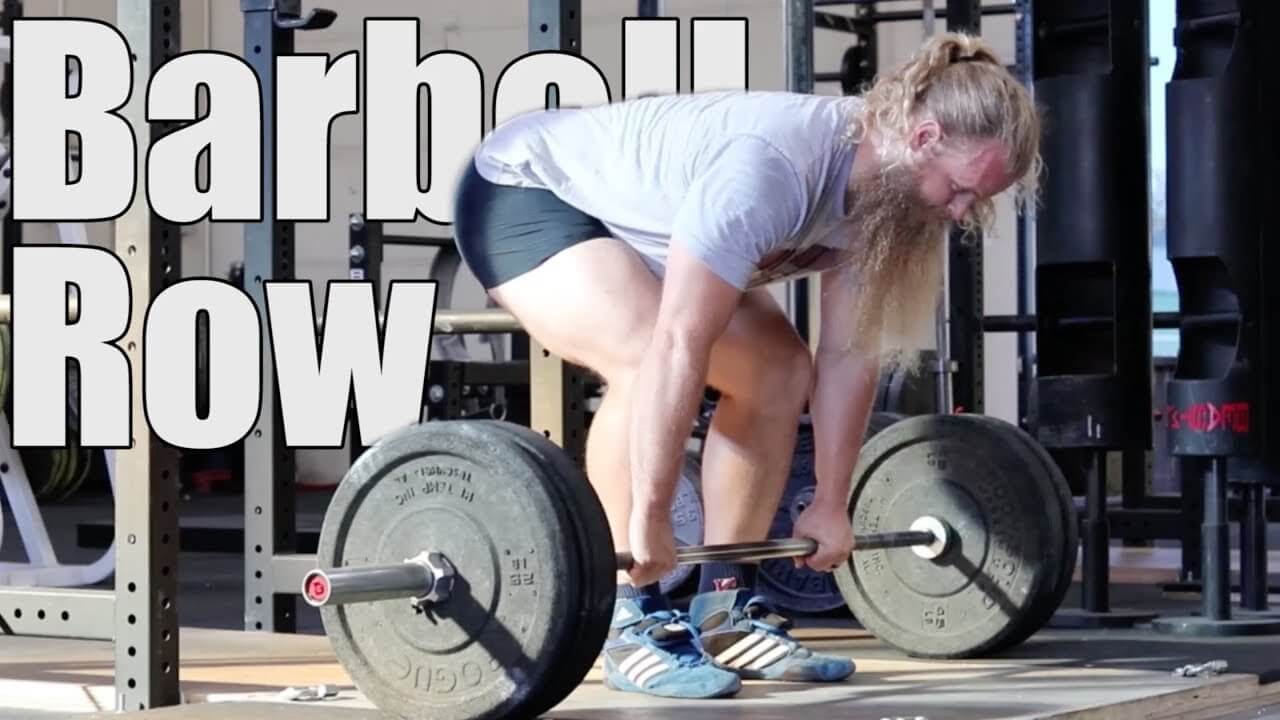
Here’s what the standard barbell row looks like:
As you can see, to perform the standard barbell row, you stand over a loaded barbell with your feet about 6 to 12 inches apart.
Then, bending at the waist, you reach down and grip the bar with your hands about double shoulder-width apart and a double overhand grip (palms facing down).
Flatten your back and initiate the exercise by raising your hips to pull the weight off the floor, building momentum. Continue pulling the barbell until it touches your torso somewhere around the bottom of your rib cage, and then reverse the movement to allow the barbell to drop back to the floor.
There are some finer points we’ll get into later in this article, but those are the broad strokes.


What Muscles Does the Bent-Over Row Work?
Most people think the bent-over row only trains your back muscles.
While it’s primarily a back exercise (that’s what you want to consider it when planning your workouts), when performed properly it also trains your arms, shoulders, and even legs to a slight degree.
Specifically, the bent-over row helps develop your back muscles including the . . .
- Latissimus dorsi
- Trapezius (traps)
- Rhomboids
- Teres major and minor
- Infraspinatus
- Erector spinae
As well as arm and shoulder muscles such as the . . .
- Biceps brachii
- Biceps brachialis
- Forearms
- Posterior deltoids
And to a lesser extent, the bent-over row also trains the . . .
As with most compound exercises, the stronger you get on the bent-over row, the more you’ll need to recruit other muscle groups to help stabilize your body throughout the movement, turning it into more and more of a full-body exercise.
How to Barbell Bent-Over Row with Proper Form
We’re going to take a few minutes to discuss how to barbell bent-over row with perfect form because this is the most effective and technically demanding type of row you can do.
Furthermore, the skill you develop on this exercise will serve you well on all other types of rowing that you do.
So, there are three parts to bent-over rowing with proper form:
- The setup, where you position your body to pull the weight off of the floor.
- The ascent, where you pull the weight from the floor to your torso.
- The descent, where you return the weight to the floor.
Every aspect of bent-over row technique—whether it’s grip, foot placement, back angle, or anything else—can be filed under one of these three categories.
When it all comes together properly, it looks like this:
Watch Mark do those bent-over rows a few times and note the following points:
- His feet are about 6 to 12 inches apart (taller people will generally prefer a wider stance).
- His hands are about 3 to 6 inches wider than his shoulders.
- There’s minimal movement in his lower body during the lift (as you get stronger you’ll inevitably use your legs to help out more, but you don’t want it to turn into a bastardized deadlift).
- He brings the bar all the way up to his torso without jerking his back to build momentum.
- He allows the weight to return to the floor in a controlled manner.
As the barbell bent-over row is the most common and widely considered the most effective kind of bent-over row, we’ll focus on how to do that. If you can do a barbell bent-over row properly, then you’ll also have no trouble doing the other variations with good form.
Let’s take a closer look at each of the three phases of the movement, starting with the setup.
Step 1: The Setup
The bent-over row starts with the bar on the floor, not on the rack or safety arms or pins.
Walk up to the bar and position your feet so they’re slightly narrower than shoulder-width apart with your toes pointed slightly out.
Then, move the bar toward you until it’s in line with your shoulders or slightly behind it. This will put the bar somewhere between against your shins and over the middle of your feet. For taller or skinnier people, the bar will probably be against their shins. For shorter or thicker people, it’ll settle somewhere around the middle of the feet.
Proper bar position is important because it allows you to pull the bar more or less straight up into your torso and generate maximum power, as opposed to up and in toward or away from your body, which is less efficient.
Next, stand up tall with your chest out and take a deep breath of air into your belly (as opposed to your chest), bracing your abs as if you were about to get punched in the stomach.
Then, move down toward the bar by pushing your hips back and bending slightly at the knees, similar to how you get into position for the deadlift.
Unlike the deadlift, however, you want to start the bent-over barbell row with your hips high and legs straight enough to allow your back to be more or less parallel with the floor.
Next, place your hands on the bar with a double-overhand grip (both palms facing down) a few inches wider than your shins, and squeeze it as hard as you can.
Make sure your shoulders are tucked back and down, your back is flat, and your head is in a neutral position with your eyes focused on a spot 6 to 10 feet in front of you. Don’t look up at the ceiling or down at your feet.
Here’s the final result that we’re going for:
Now you’re ready to ascend.
Step 2: The Ascent
Start the pull by extending your legs (raising your hips) to “pop” the weight off the floor, and then start pulling your elbows toward the ceiling to keep it moving upward. Ensure your shoulders rise with your hips and your back maintains its flat, neutral position.
Once you’ve got the weight moving, just keep pulling the weight until the barbell makes contact with the bottom of your rib cage. The bar should move up your shins, and once it reaches knee height your legs should be straight enough that the bar can easily pass over your knees.
Throughout the entire movement, you want to keep your head in its neutral position in line with your spine, your lower-back slightly arched, and your core tight.
Also, try to keep the bar on as vertically straight of a path as possible because any deviations are just going to slow you down and make it harder to maintain good form. In other words, the bar shouldn’t move noticeably toward or away from you.
Here’s how this movement looks:
Step 3: The Descent
The final part of the bent-over row is lowering the weight back down to the floor in a controlled manner.
This is basically a mirror image of what you did to stand up.
Quickly lower the bar toward the ground until your arms are locked, and then drop your hips enough for the weight to reach the floor.
Your back should remain locked in its neutral position the entire time, and your core should remain tight. Don’t try to lower the bar slowly or quietly. The entire descent should take no more than a second.
You’re now ready for the next rep.
Many people don’t stop to reset in between reps and instead only lower the bar a few inches above the floor, like a Romanian deadlift. This is fine if you’re using light weights, but I prefer to reset between every rep—what some people refer to as a “Pendlay row” (named after Olympic weightlifting coach Glenn Pendlay).
In this case, you fully lower the weight to the ground after each rep and reset your bottom position—including your breath—before starting the next rep. This makes it easier to maintain proper form (and thus may reduce your risk of injury) and basically becomes a necessity once you start using heavy weights if you’re going to stay strict on your form.
That’s it for the classic barbell bent-over row!
If you want to run off and practice a little, grab a broomstick, pool cue, or similar implement and work through the movement.
3 Bent-Over Row Variations You Should Know
You just learned the conventional bent-over barbell row, which is one of the best exercises you can do for your “pull” muscles.
The truth is you probably don’t need other forms of bent-over rowing to achieve your ideal back and biceps, but there are three variations in particular that I think are worth learning and doing in addition to, and sometimes in place of, the barbell row.
For some people it’s a matter of their anatomy and mobility (barbell rowing is very uncomfortable for some), and for others it’s equipment availability or preferences.
I personally like to slot the barbell row in as the second exercise in my pull workouts (after deadlifting) and often follow it up with one of the following exercises. And then, every couple of months or so, I swap the barbell row for one of the following exercises and follow it with another of the three or with wide- or close-grip pullups.
Dumbbell Bent-Over Row
The dumbbell bent-over row is similar to the regular barbell row, but involves using dumbbells, usually one arm at a time.
Here’s what it looks like:
With the one-arm variation, you first place a dumbbell next to a bench. Then, choose an arm to start with and put the other hand, knee, and foot on the bench to support your upper body. Plant your other foot solidly on the floor a few feet away from the bench to provide maximum stability.
Then, lean over and grab the dumbbell with your free hand and straighten your back so it’s parallel to the floor.
Pull your shoulder blades back and down (“into your back pocket” as some people say), pull the dumbbell straight up toward your torso until it touches your stomach. Then lower the weight to the ground.
Try not to cheat by twisting your torso to jerk the weight up, as this reduces the effectiveness of the movement and may increase your risk of injury.
You can also perform the dumbbell bent-over row while standing on two feet and leaning against the dumbbell rack, like this:
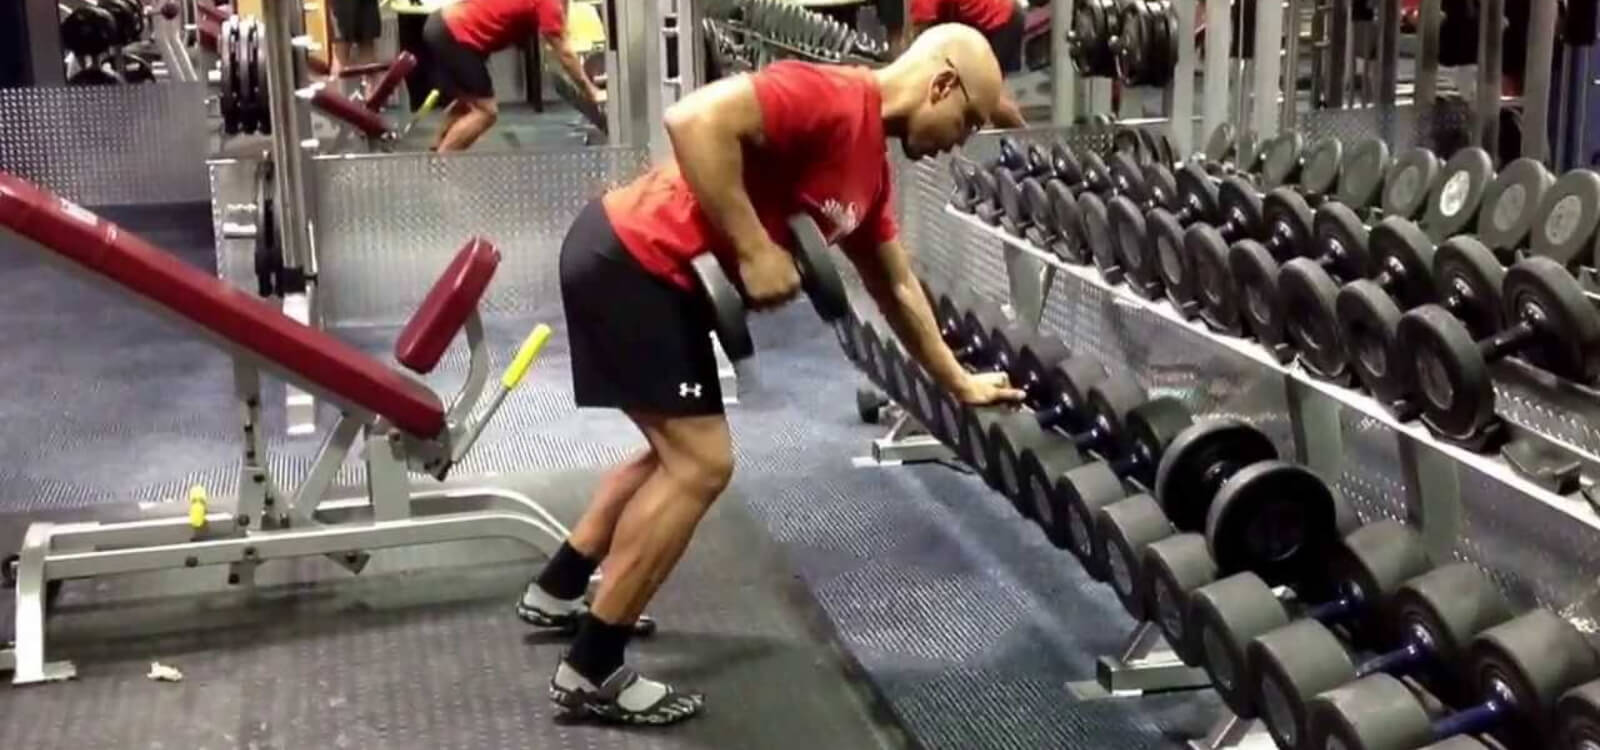
I don’t like this style of dumbbell rowing as much as the more traditional one-arm style, however, because it requires more balance, it forces you to lift the weight further from the floor on the first rep, and it makes it harder to keep your back straight when the weights get heavier.
Yates Row (Underhand Bent-Over Row)
The Yates row is a kind of bent-over barbell row that involves an underhand grip (palms up) and a more upright posture.
Here’s what it looks like:
The Yates row was popularized by 6-time Olympia winner Dorian Yates, who frequently used this variation of the bent-over row in his training.
The point of the Yates row is to train the biceps, traps, and upper back more than the conventional bent-over barbell row. The idea is that by flipping your grip, you can force these muscles to work harder than they would have to with the regular bent-over row.
How well this actually works is up for debate, but many bodybuilders swear by its effectiveness. If nothing else, it gives you an alternative to the conventional barbell row for when you stop progressing or are starting to feel like your shoulders or elbows are taking a beating after months of the same movement patterns.
T-Bar Bent-Over Row
The T-bar bent-over row is an exercise that involves taking the close-grip handle from a cable row machine and pulling it against the end of a loaded barbell.
Here’s what it looks like:
The T-bar bent-over row isn’t as technically demanding as the conventional bent-over barbell row, which makes it a good later-in-your-workout exercise, when you’re feeling the fatigue start to set in from your heavier, harder lifts.
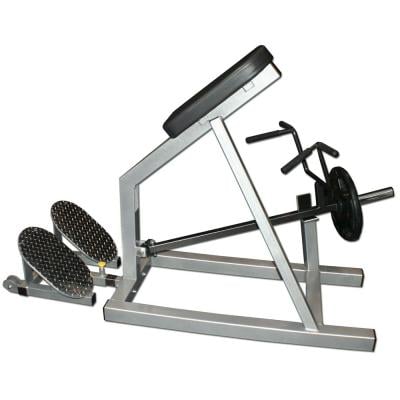
You can also do the machine version of this exercise if you can’t or don’t want to jerry-rig the setup. My favorite T-bar machine is the Hammer Strength T-bar machine, which looks like this:
A Simple, Effective, and Challenging Bent-Over Row Workout
You now know how to bent-over row, along with the best variations.
That means that it’s time to get to work.
Below you’ll find a simple and effective pull/back workout that incorporates several of the exercises you just learned about as well as a couple others to make it even more effective.
You’ll notice that the deadlift comes before bent-over rows in this workout. That’s because the deadlift involves more total muscle mass, is technically more demanding, and allows you to lift more weight, all of which makes it significantly more difficult and tiring than any type of bent-over barbell row.
Thus, it’s best to do the deadlift first in a workout like this, when you’re feeling physically and mentally freshest. Then, you’ll usually want to do your second-hardest exercise (often another compound exercise), followed by any less-demanding exercises that you want to do next.
Let’s get to the workout.
Barbell Deadlift
Warm-up and . . .
Men/Experienced Deadlifters: 3 sets of 4 to 6 reps at 80 to 85% one-rep max (1RM)
Women/New Deadlifters: 3 sets of 8 to 10 reps at 70 to 75% of 1RM
Bent-Over Barbell Row
3 sets of 4 to 6 (men/experienced) / 8 to 10 (women/new) reps
Lat Pulldown (Wide-Grip)
3 sets of 4 to 6 / 8 to 10 reps
(Optional) T-Bar Row or T-Bar Machine Row
3 sets of 8 to 10 reps
And now a few odds and ends on how to do this workout:
Don’t go to absolute muscle failure every set.
Muscle failure is the point where you can no longer keep the weight moving and have to end the set.
We should take most of our sets to a point close to failure (one or two reps shy), and we should rarely take sets to the point of absolute failure.
Personally, I never train to failure for more than two to three sets per workout, and never on the deadlift, squat, bench press, or military press, as it can be dangerous.
Instead, I reserve my failure sets for isolation exercises like hamstring curls, leg extensions, calf raises and the like, and it’s usually a natural consequence of pushing for progressive overload as opposed to deliberate programming.
Rest 3 to 4 minutes in between each set.
This will give your muscles enough time to fully recoup their strength so you can give maximum effort each set.
Once you hit the top of your rep range for one set, move up in weight.
For instance, if you deadlift 135 pounds for 6 reps on your first set, add 5 pounds to each side of the bar for your next set.
If, on the next set, you can get at least 4 reps with 145 pounds, that’s the new weight you work with until you can deadlift it for 6 reps, move up, and so forth.
If you get 3 or fewer reps, though, reduce the weight added by 5 pounds (140 pounds) and see how the next set goes. If you still get 3 reps or fewer, reduce the weight to the original 6-rep load and work with that until you can do two 6-rep sets with it, and then increase the weight on the bar.
The Bottom Line on the Bent-Over Row

The bent-over row is one of the best back exercises that you can do.
Although there are several kinds of bent-over rows, my favorite for gaining maximum muscle and strength is the conventional bent-over barbell row.
It trains every major muscle in your back, as well as your biceps, shoulders, and forearms, and as the weights get heavier, your legs even get involved.
To get the most out of the bent-over row, though, you need to learn proper form. Here’s what that looks like in a nutshell:
- Stand directly over the bar.
- Position your feet about 6 to 12 inches apart.
- Take a deep breath, bend over, and grip the bar with both your hands 3 to 6 inches outside of your shins and your palms facing down.
- Stare at a point about 6 to 10 feet in front of you, and straighten your back so that it’s more or less parallel with the floor, raising your hips as needed.
- Still holding your breath and keeping your arms straight, raise your hips to get the bar moving upward.
- With your back remaining in its neutral, flat position, pull your elbows toward the ceiling until the bar touches the bottom of your ribcage.
- Return the bar to the floor by reversing the movement.
Depending on your anatomy, mobility, equipment availability, and preferences, you may want also want to try out one or more of these bent-over variations in your training:
- Dumbbell bent-over row
- Yates row
- T-bar bent-over row
I personally like to slot the barbell row in as the second exercise in my pull workouts (after deadlifting) and often follow it up with one of the following exercises. And then, every couple of months or so, I swap the barbell row for one of the following exercises and follow it with another of the three or with wide- or close-grip pullups.
That’s it! Enjoy your bent-over rowing!