Key Takeaways
- The military press is one of the best exercises for developing almost every major muscle group in your body, including your shoulders, upper chest, triceps, and core, and even your glutes, biceps, and lats to a lesser degree.
- Learning proper military press technique boils down to ingraining a few simple habits, and remembering a handful of effective cues (which you’ll learn below).
- The standing barbell military press is the most popular style, but the seated barbell and dumbbell military presses, push press, and dumbbell Arnold press are worth trying as well.
Here’s something everyone learns soon after getting into weightlifting:
Your upper-body development isn’t complete until you have great shoulders.
You can have outstanding pecs, bulging arms, and six-pack abs, but if your shoulders are small, the “look” just isn’t complete.
If you’re a man, you need full, round shoulders that frame your chest and look proportional to your biceps and chest.
If you’re a woman, this means sculpted, lean shoulders that make your arms look more defined and your waist look smaller.
You can get there many ways using many different exercises, but it’s going to be a whole lot faster and easier if you include the military press in your regimen.
Since the late 1800s, the military press and other overhead pressing variations have been considered the truest test of upper body strength.
For example, noted strongman Arthur Saxon made overhead pressing a key fixture of his training, and once overhead pressed 370 pounds with one arm:
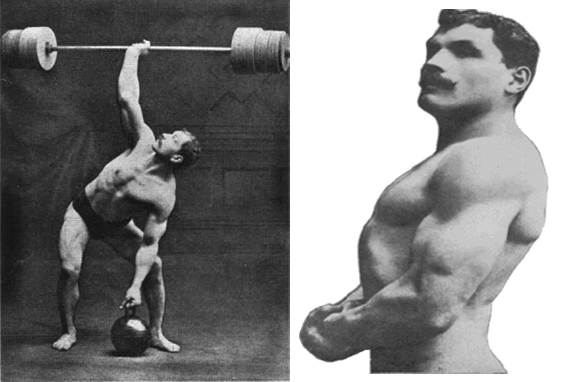
The military press was also one of the three weightlifting exercises included in the Olympics in 1928, along with the clean and jerk and snatch.
You don’t see many people doing it in the gym these days, however. Why?
One reason is its removal from the Olympics in 1972, and another is the rise of powerlifting, which emphasizes bench pressing over military pressing.
The bench press is also easier for most people to learn than the military press and lets you move heavier weights, which makes it more appealing to new lifters.
This cultural shift away from the military press is a shame, however, because it’s possibly the single best exercise you can do for building strong, developed, and healthy shoulders.
I can attest to this firsthand.
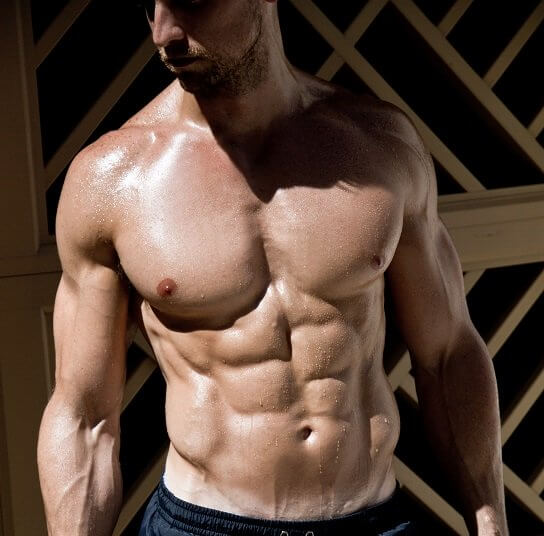
Here’s a picture of me several years ago, before I had gotten serious about military pressing:

I was happy with my overall look, but look at my right shoulder in relation to my biceps and triceps.
Simply put, it was too small—a “weak point” in my physique. (And the same was true of my other shoulder as well.)
Soon after this picture was taken, I began military pressing in earnest, and here’s what a few years of hard pressing yielded:
Again, compare the size and sweep of my shoulders to the mass of my biceps and triceps. A noticeable improvement, right?
I’ve kept at it ever since, and it’s kept paying dividends in the form of small, steady gains in shoulder size and strength. Here’s where I’m at now:
View this post on Instagram
So, while building big, strong, proportional shoulders has always been an uphill battle for me, I can thank the military press for a lot of what I’ve been able to achieve.
And not just any ol’ military pressing, either—heavy military pressing, which requires a bit of determination to get good at.
Balance, coordination, flexibility, and sheer audacity are all involved in successfully pressing large amounts of weight over your head.
Progression on the military press can also be trying because it’s always slower and more sporadic than you want, meaning you have to be willing to grind through extended periods of stagnation to finally break through to new levels of strength and skill.
The payoff is well worth the difficulties, though.
And fortunately, if you learn and apply the key lessons I’m going to share in this article, you’re going to avoid the biggest pitfalls and reinforce the habits that make for proper, powerful military pressing.
The by the end of this article, you’re going to learn . . .
- What muscles the military press works
- The differences between the military press, overhead press, and the shoulder press
- The four best military press variations (and one you should avoid)
- How to build an effective military press workout
- Twelve scientifically proven ways to improve your military press
- And more.
Let’s get started.
Table of Contents
What Muscles Does the Military Press Work?
The military press is unique in that it trains almost every major muscle group in your upper body and even stimulates your glutes as well.
Specifically, the military press primarily involves your . . .
Although to a lesser extent, it also trains your . . .
- Abs
- Biceps
- Lower back
- Serratus anterior
- Latissimus dorsi
- Glutes
In fact, the only major muscle groups that aren’t involved in the military press are the quads, calves, and hamstrings.
The shoulders bear the brunt of the load in the military press, of course, and particularly the anterior (front) and medial (middle) delts.
The primary muscle group in your back recruited by the military press is the trapezius (traps), but the rhomboids also play an important role as well as the muscles in the lower back.
The military press also heavily activates the triceps as well as the biceps to a lesser degree, making it an excellent exercise for increasing arm strength and size.
Finally, one of the things that make the military press more challenging than other shoulder exercises is it requires stabilizing your entire torso as you perform each rep. In this way, it’s also an outstanding exercise for training your abs, obliques, and other core muscles.


Military Press Form 101
If you just want a quick summary of how to military press, this should suffice:
- Position the bar in a squat rack at about shoulder height.
- Grab the bar with both hands, palms down, about shoulder-width apart.
- Position your feet so that if you drew a line straight down from the bar, it would go through the middle of your foot.
- Bring your upper chest to the bar so that it touches the base of your throat and rests atop your shoulders.
- Bring your shoulders under the bar so it’s resting on top of your deltoids and upper chest.
- Stare at a point directly in front of you, lift the bar off the rack, take one step back with each foot, and position them about shoulder-width apart.
- Take a deep breath, flex your glutes as hard as you can, and push the bar into the ceiling, shifting your head back slightly if needed to allow the bar to move straight up.
- Once the bar clears the top of your head, force your torso under the bar while continuing to push it toward the ceiling until your arms are locked out.
- Reverse the motion to return the bar to your chest to get ready for the next rep.
Here’s what the whole sequence looks like:
View this post on Instagram
The Military Press vs. the Overhead Press vs. the Shoulder Press
Search for information on the military press, and you’ll also find plenty of articles, videos, and podcasts on the “overhead press” and “shoulder press” as well.
Some say the overhead press is a blanket term for all overhead exercises and the military and shoulder presses are just different kinds of overhead presses.
Some say that the military press involves keeping your feet together and not moving your torso, but I’ve never seen someone do this in the gym and it wouldn’t be helpful even if they did.
The reality is there’s no official definition for any of these exercises, so they can all be used more or less interchangeably.
That said, when people say “military press,” they’re usually referring to what’s also called a standing barbell overhead press.
Unless someone specifies the use of dumbbells or being seated instead of standing, it’s safe to assume the “military press” they’re referring to is the standing barbell variation.
How to Military Press with Proper Form
There are three steps to military pressing with proper form:
- The setup, where you position your body to military press as much weight as possible.
- The ascent, where you push the weight above your head.
- The descent, where you lower the weight back to your shoulders in a way that prepares you for the next rep.
Every aspect of military press technique—whether it’s grip width, foot placement, back angle, elbow position, or anything else—can be filed under one of these three categories.
Let’s go through each of them in detail, starting with the setup.
Step 1
The Setup
A proper military press setup involves just five steps:
- Rack the bar.
- Position the bar.
- Grip the bar.
- Unrack the bar.
- Position your feet.
That’s it.
Let’s take a closer look at each of these steps.
1. Rack the bar.
First, make sure the rack isn’t too high or too low.
You should be able to unrack the bar without having to half-squat it off the rack and without having to get up on your tippy toes.
A good rule of thumb is racking the bar one to two inches below its position when you’re standing tall at the beginning of the lift, or around the top of your breastbone.
Here’s the general idea:
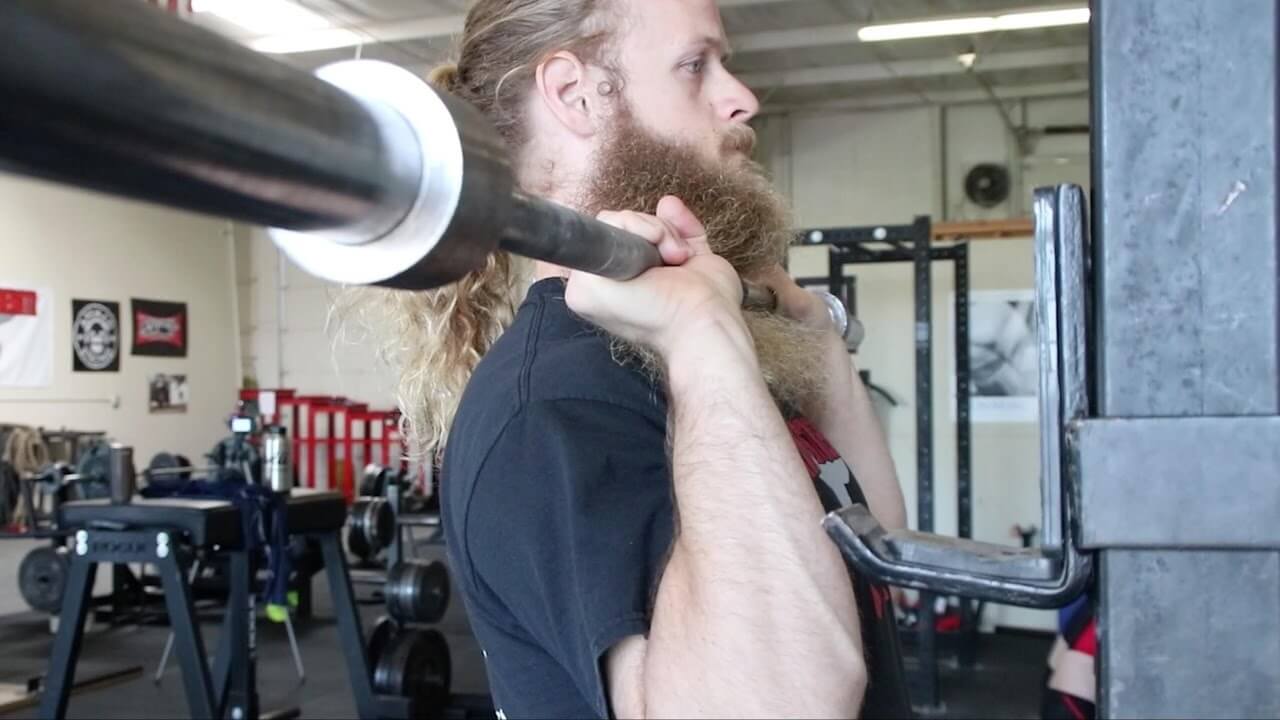
2. Grip the bar.
Grip the bar about shoulder-width apart with your palms facing away from you.
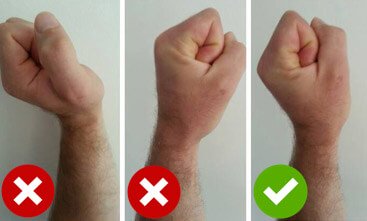
Hold the bar low in your hands, closer to your wrists than your fingers, and squeeze it as hard as you can.
Your wrists should be bent just enough to allow the bar to settle into the base of your palm, but not folded back at a 90-degree angle. This prevents wrist pain.
Here’s how this looks:
Many people military press using a slightly wider grip than this—something more akin to the bench press or even wider—to make the exercise a bit easier by reducing the range of motion.
This is generally a bad idea.
Military pressing with too wide of a grip makes the beginning of each rep harder than it should be and makes it more difficult to properly stabilize your torso once the bar clears your head.
Plus, reducing the range of motion reduces the overall effectiveness of the exercise.
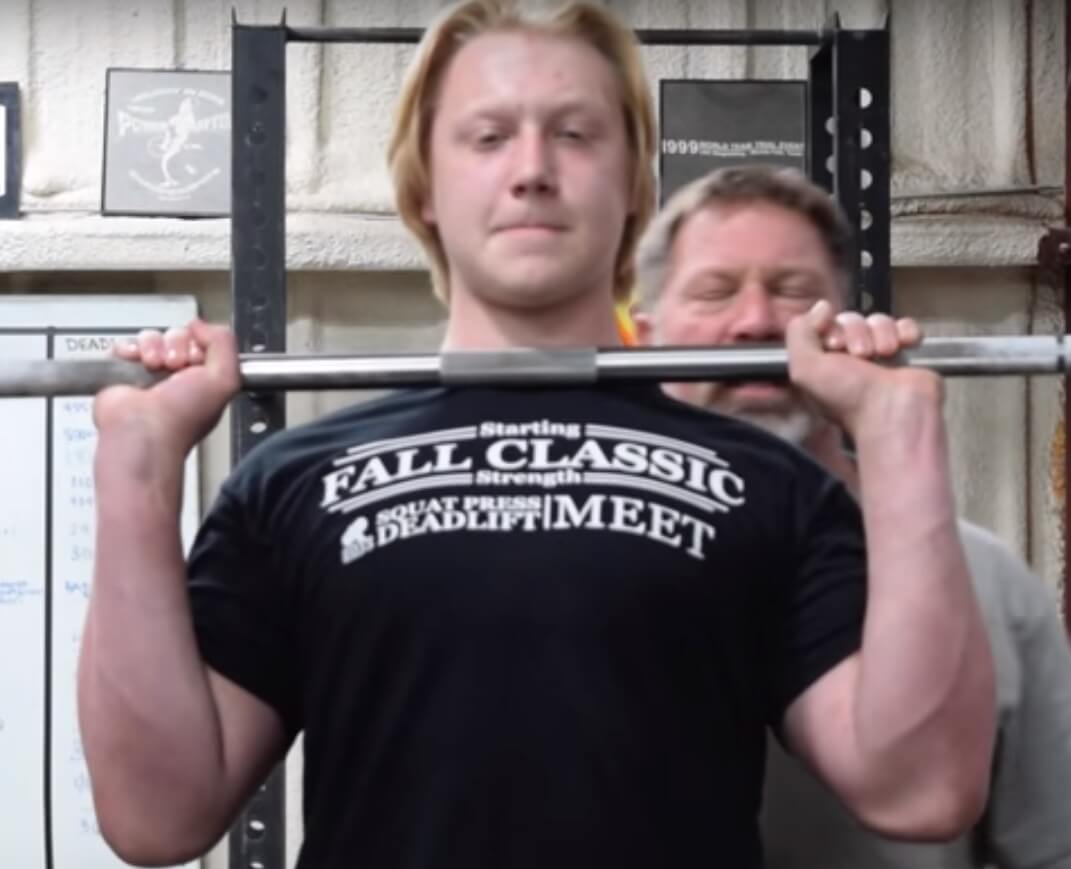
Instead, you want your hands to be in line with or just outside your shoulders, and your forearms should be parallel with one another and perpendicular to the bar, like this:
A common mistake people make in setting up for the military press is flaring their elbows out to the sides once they’re underneath the bar. This causes the bar to tip forward and bleeds torso tightness, which makes it harder to initiate the press.
Instead, you want your elbows to remain close to your sides and extended a few inches in front of the bar, placing it high on your shoulders and over your midfoot.
Most people use a full grip with their thumbs wrapped around the barbell when military pressing, and others prefer a thumbless “suicide” grip, which looks like this:
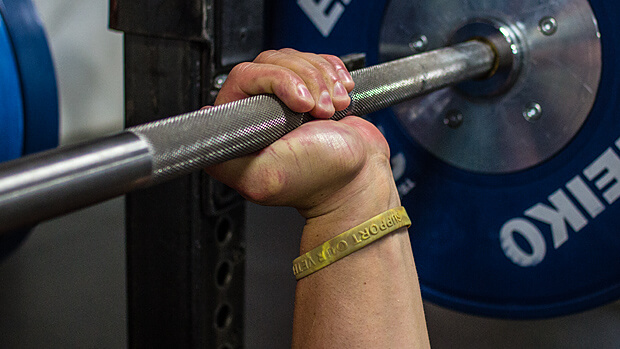
I recommend you stick with the full grip, as it’s stronger and safer. It also allows you to squeeze the bar as hard as you can, which is a helpful cue for pushing heavier weights.
That said, if you find the “suicide” grip more comfortable, that’s fine too as long as you’re careful. Unlike the bench press, it’s easy to duck out of a failed rep on the military press, so the risk of dropping the bar on yourself is far lower.
3. Position the bar.
Pushing your elbows in toward your body and slightly in front of the bar, allow the bar to rest on the tops of your shoulders and upper chest.
Arch your upper back enough so that the bar is aligned over your midfoot and your head is slightly behind the bar, like this:
Some people say that arching your back in this manner is dangerous, but that’s nonsense.
As long as you don’t have a previous back injury, then a slight backward lean isn’t bad for your spine and is required to military press correctly.
Some people also prefer to hold the barbell in their hands throughout each set instead of resting the bar across their chest and shoulders, like this:
This method can work, but I prefer to bring the bar to the top of my chest and shoulders on each rep because it ensures you’re using a full range of motion.
If you’re new to the military press, you’re probably going to find this uncomfortable at first. Like the front squat, you’ll eventually get used to the position, but if it’s unbearable when you start out, simply use lighter weights until you’ve gotten used to the feeling.
Most people find the pain goes away after their first three to five military press workouts.
4. Unrack the bar.
Put your feet directly under the bar (not behind it), take a deep breath, raise your chest and push your elbows just in front of the bar, and lift the bar off the rack.
Take one step back with each foot, making sure the first is firmly planted before moving the other.
Don’t take several baby steps backward. This wastes energy and forces you to move farther to re-rack the bar at the end of your set, which can be dangerous.
The rule of thumb is this: Move just enough to get clear of the rack, and no more.
Here’s a short video that breaks it down:
5. Position your feet.
Figuring out your ideal stance width will probably require some trial and error, but to start, position your feet just outside of shoulder-width, like this:
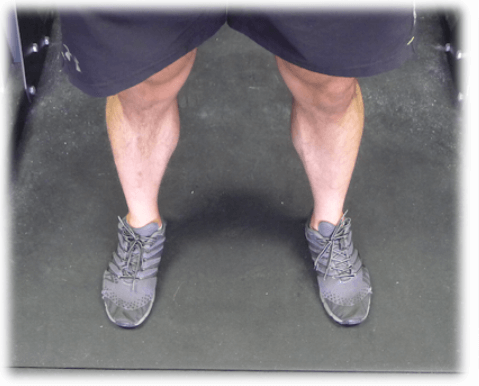
For most people, this will be about where you would position your feet for a back squat or front squat. If you’re tall, then you may also want to position your feet a little closer together than this.
What matters most is that you can properly stabilize the weight as you press the bar upward, so whatever stance width helps you do that best is what you should stick with.
Step 2
The Ascent
Here’s what we want to achieve on the ascent:
View this post on Instagram
And I want you to notice a few things in particular:
- The bar is moving straight up and down, not gliding forward or backward.
- My upper back is slightly extended but only enough to allow the bar to pass my face.
- My elbows start just in front of the bar and finish directly underneath it.
- My hips and legs stay more or less motionless through the whole movement (no wobbling).
- My head stays in line with my back.
That’s what you’re going for in a nutshell. Here’s how to do it:
First, take a deep breath, trapping the air in your stomach. As you breath in, you should feel your stomach expanding, not your chest (like this).
Then, press your tongue against the roof of your mouth, sealing your windpipe. Tighten your core muscles as if you were about to get punched in the gut.
Squeeze your glutes as hard as you can, raise your chest toward the ceiling, tuck your elbows in and slightly forward, and push the bar off your chest and toward the ceiling.
Keep your head in line with your back, and the second the bar passes the top of your forehead, push your torso underneath the bar.
As you get some experience with the military press, you’ll notice that if you get stuck on a rep, it’s almost always in the first half of the movement, when you’re trying to get the bar above your head. Once you’ve cleared your noggin, you’re usually home free.
That’s why it’s essential to initiating each rep by forcing the bar off your chest as hard as you can, and then pushing your head underneath the bar as you continue pressing it toward the ceiling.
Keep pushing the bar until your elbows are locked above your head, at which point you’re ready for the descent.
Step 3
The Descent
The descent is a reverse image of the ascent:
You lower the bar back to your chest, leaning your head and upper back a few inches backward to allow the bar to pass in front of your face.
The biggest mistake people make in the descent is allowing the bar to drift forward for fear of hitting their head or face. While this protects you from whacking your face, it also throws off your balance and wastes energy.
This is why you want to lower the bar straight down, no more than an inch or two in front of your nose, until it comes to rest on your upper chest and shoulders.
Once the bar is back in its original position, push it up again as hard as you can, preferably with little to no pause between reps.
5 Military Press Variations You Should Know
The traditional military press is done with two hands on a barbell that’s resting on your upper chest and shoulders, with both feet about shoulder-width apart, standing on a hard surface (no Bosu balls, please).
There are several variations worth knowing, however. A few can be done instead of or in addition to the traditional military press, and one variation should be avoided.
Here they are:
- The seated military press
- The push press
- The seated dumbbell military press
- The dumbbell Arnold press
- The Smith machine military press
Let’s look at each.
The Seated Military Press
The seated military press is identical to the standing press, except it’s done while seated on a bench instead of standing on your feet.
Here’s what it looks like:
The seated military press requires either a dedicated station, like this . . .
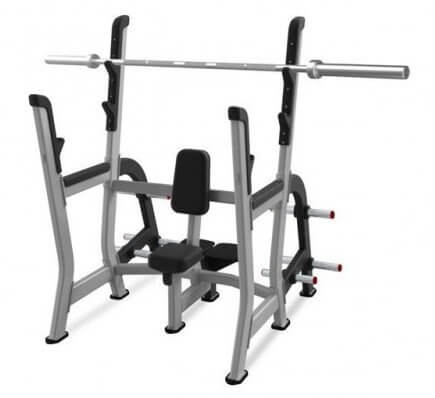
Or a squat rack or power cage like these . . .
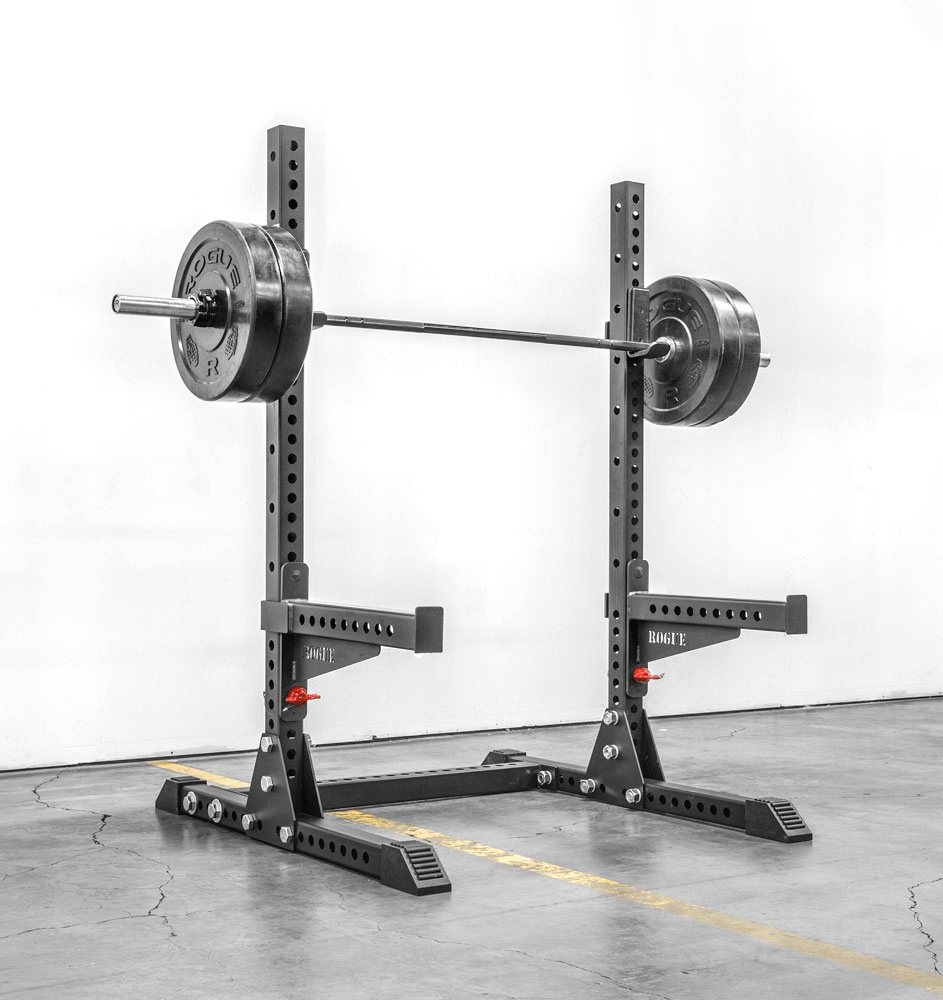
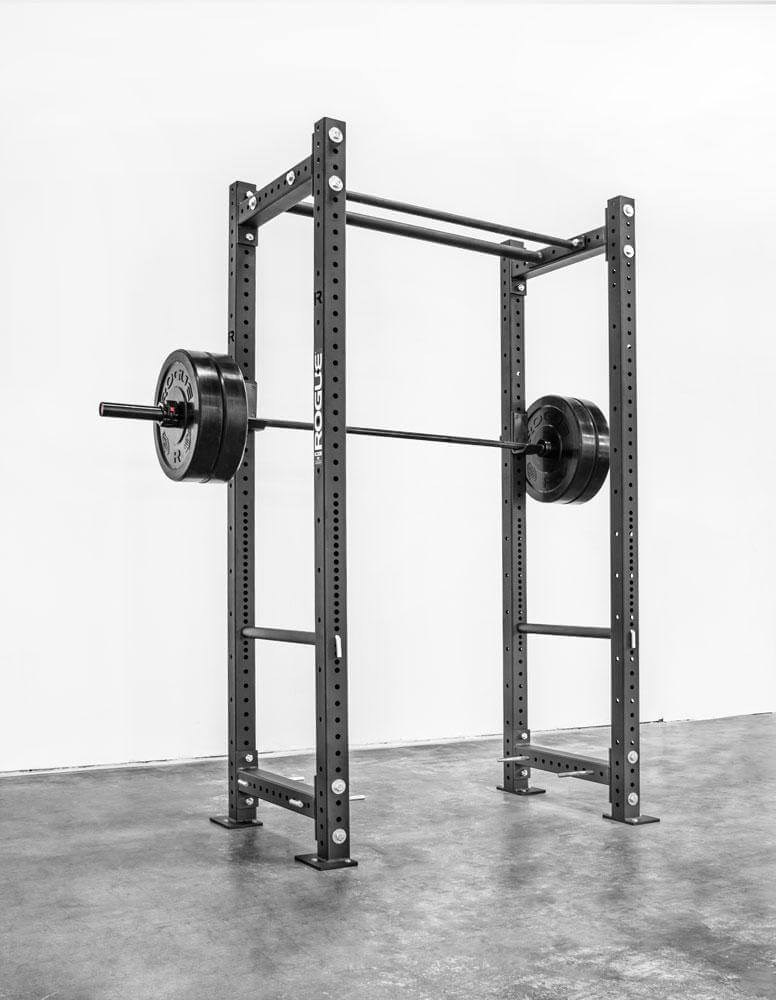
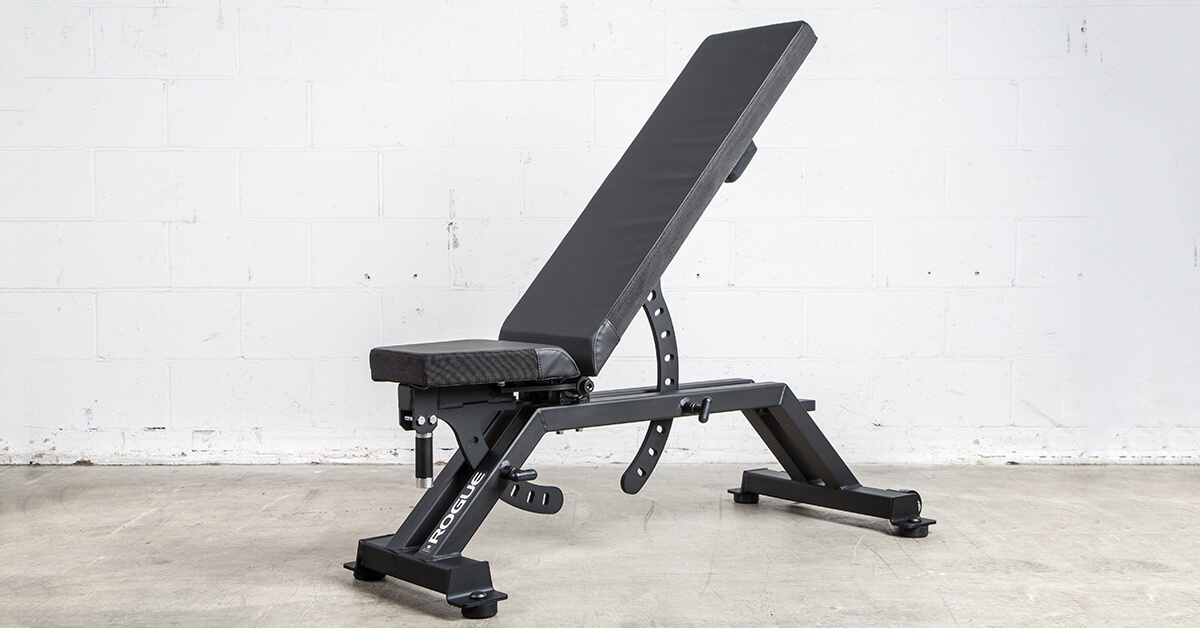
Plus a utility bench, like this . . .
To do the seated military press, place your feet flat on the ground about shoulder-width apart with your toes and knees slightly turned out.
Press your heels into the ground to keep your upper back and butt rooted in place against the back of the bench.
The rest of the movement is just like a standing military press.
Here’s how it looks:
The first thing you’ll notice about the seated military press is it’s significantly easier than the standing press.
This is why many well-informed strength training experts like Mark Rippetoe say the standing variation is better for developing whole-body strength and muscularity.
A study conducted by scientists at FacSogn og Fjordane University College supports this claim.
In this study, the researchers had 15 young, healthy lifters perform both the seated and standing military press with 80% of their one-rep max (1RM). The researchers also attached electrodes to the men’s deltoids, biceps, and triceps to measure muscle activation.
To record muscle activation, they used an electromyograph (EMG), which measures the electrical activity within a muscle. More electrical activity within a muscle indicates more muscle fibers contracting, which translates into a more powerful stimulus for muscle growth.
The researchers found that overall muscle activation was slightly higher in the standing versus seated military press, but the differences weren’t huge.
That said, there are a few drawbacks to the standing military press that you should be aware of:
- You won’t be able to move as much weight.
- You’ll progress slower.
- You’ll need more time to get good at it.
You see, the standing military press isn’t just a shoulder exercise—it’s a whole-body exercise that requires many support muscle groups to engage and work together, including the abs, lats, and lower back.
This is why most people find they can press about 10% more weight when seated versus standing and progress to heavier weights faster.
This makes the standing military press better in terms of whole-body muscle activation, but worse if your main goal is to target your shoulders as much as possible. For maximally overloading your shoulders, the seated press is superior because you aren’t limited by the strength of smaller, supporting muscle groups or your balance.
For my part, I mostly prefer the seated military press for most of my training because my heavy deadlifting, rowing, and squatting is more than enough for training my core and back. When I’m training shoulders, I want to focus on them as much as possible.
That said, I do opt for the standing press every few training blocks or so just to maintain familiarity with it and subject my body to a new challenge.
The Push Press
The push press is a military press variation that involves using your legs and hips to help push the bar off your shoulders.
Here’s what it looks like:
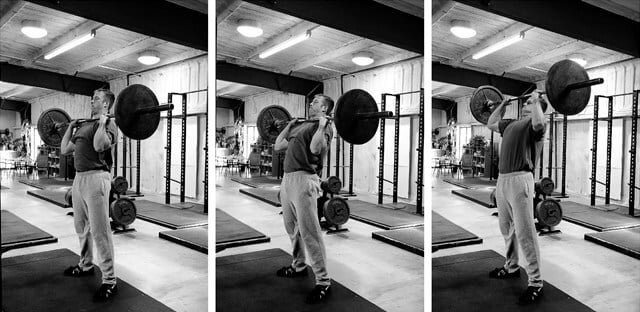
As you can see, the push press is basically a standing military press that begins with a quarter squat to help launch the bar upward. As you rise from the squat, you press the bar upward until your arms are locked overhead.
“So it’s just a sloppy standing military press?” you might be wondering.
Kind of.
The point of the push press is to generate just enough momentum to help get the bar off the shoulders and through the first few inches of movement, where it’s most likely to get stuck. From there, your shoulders must do the rest of the work.
In this way, you’re able to use heavier weights on the push press than the standing military press. That said, the push press also makes it easier to “cheat” by giving the bar more of a boost than necessary, defeating the purpose of the exercise to one degree or another.
Another problem with the push press is it’s hard to judge your progress because it’s hard to perfectly duplicate the force of the boost on every rep of every set.
For example, let’s say you squat a little too much in your first set, allowing you to hit the top of your rep range and move up in weight. Hooray!
Unfortunately, however, on the next set, you don’t boost the bar quite as much and can’t get more than a couple reps with the new, heavier weight. And back down you go.
It’s possible to get good enough at the push press through practice to make this a non-issue, but it typically takes several months to get good at the exercise and several years of regular work to master it.
That’s why I only recommend the push press to people who are highly proficient at the standing barbell press and either stuck on it or just looking for a change.
If that’s you, I recommend you swap out the military press with the push press for 8 to 12 weeks to expose your shoulders to heavier weights and then switch back to the military press.
Here’s a good tutorial on how to do the push press:
The Seated Dumbbell Military Press
The dumbbell military press is more or less identical to the seated military press except it’s done with dumbbells instead of a barbell.
Here’s how it looks:
The main advantage of using dumbbells is they allow for a greater range of motion than a barbell, which typically translates into more muscle growth over time.
They also work better for correcting and preventing muscle imbalances as well as challenging your muscles in slightly different ways that could (theoretically) lead to more muscle growth.
The main disadvantage of the seated dumbbell military press is it takes more balance and coordination than the seated barbell press, which means you can’t use as much weight.
For example, my best seated military press is 225 for a couple reps, but my best seated dumbbell press is 180 pounds (90 pounds in each hand) for a few reps, or about 15% less.
Dumbbells are also much more difficult to get into the starting position than a barbell, which further limits how much weight you can use.
The standing dumbbell military press is even tougher in this way, which is why I don’t do it. Unless you’re a complete beginner, it requires too much effort to simply get heavy dumbbells into the starting position—effort that’s better applied toward actual pressing instead.
Practically speaking, I wouldn’t say the seated dumbbell military press is better than the seated barbell military press or vice versa.
Like the bench press, I’ve found dumbbell and barbell military pressing to be complementary and have included both in my workout routines for some time now. Both require strength and stability in slightly different ways and both produce good results, and so I like to alternate between them.
Specifically, I like to do 8 to 12 weeks of barbell pressing followed by 8 to 12 weeks of dumbbell pressing.
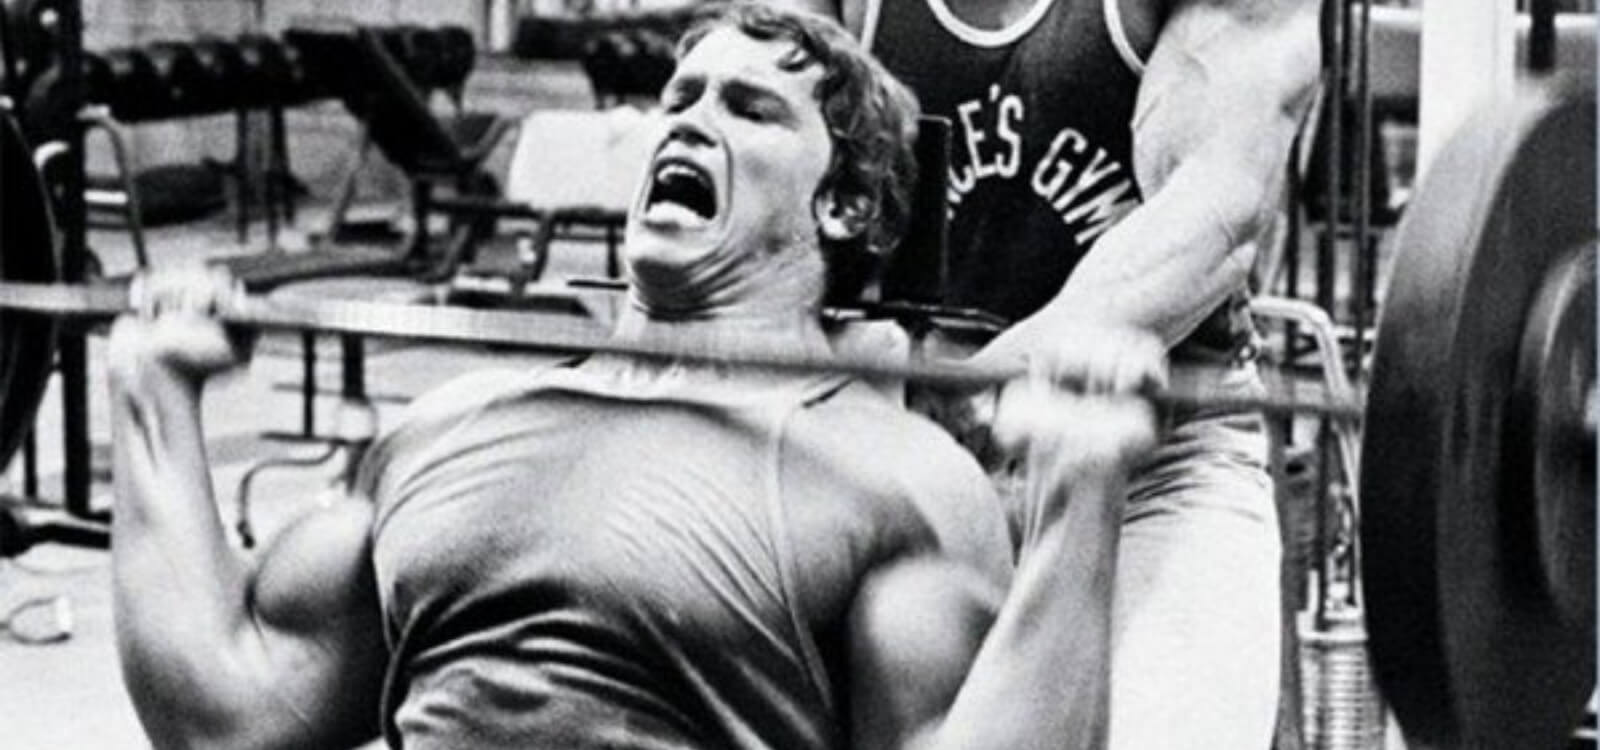
The Dumbbell Arnold Press
The dumbbell Arnold press is a variation of the traditional dumbbell military press that increases the range of motion.
Here’s how it looks:
Due to the additional work your shoulders have to do, the Arnold press reduces how much weight you can use, though. This is why I like to do it after a traditional military press.
In other words, I treat the Arnold press as an “accessory exercise” for my anterior (front) deltoids.
Here’s how to do it:
The Smith Machine Military Press
Many gyms lack a dedicated military press station and many people don’t feel like setting up in a squat rack or power cage, so it’s common to see military pressing on the Smith machine.
I think that’s a mistake.
Research shows that the Smith machine results in less muscle and strength gain than a free barbell when bench pressing and squatting, and it’s reasonable to assume the same would hold true of military pressing.
The reason why is simple: Smith machine exercises produce less muscle activation than their free weight counterparts.
Some people might say the Smith machine is safer than free weight barbell exercises, but this isn’t necessarily true if you learn and stick to proper form.
So, stay off the Smith machine and stick to the proper barbell military press. And if your gym doesn’t have a military press station, squat rack, or power cage, stick with dumbbells.
A Simple, Effective, and Challenging Military Press Workout
You now know how to military press.
You know the best variations.
Now it’s time to roll up your sleeves and get to work.
Here’s a simple and effective military press workout that incorporates several of the variations you just learned as well as some additional exercises to target the shoulders.
This is more or less what I do when I’m incorporating the military press into my workout routine.
Standing Barbell Military Press
Warm-up and . . .
Men/Experienced Pressers: 3 sets of 4 to 6 reps at 80 to 85% one-rep max (1RM)
Women/New to Pressing: 3 sets of 8 to 10 reps at 70 to 75% of 1RM
Seated Dumbbell Military Press
3 sets of 4 to 6 / 8 to 10 reps at 70 to 80% 1RM
Dumbbell Side Raise
3 sets of 8 to 10 reps at 70 to 80% 1RM
Dumbbell Rear Delt Raise
3 sets of 8 to 10 reps at 70 to 80% 1RM
And a few odds and ends on how to do this workout:
You shouldn’t go to absolute muscle failure every set.
Muscle failure is the point where you can no longer keep the weight moving and have to end the set.
We should take most of our sets to a point close to failure (one or two reps shy), and we should rarely take sets to the point of absolute failure.
Personally, I never train to failure for more than two to three sets per workout, and never on the squat, deadlift, bench press, or military press, as it can be dangerous.
Instead, I reserve my failure sets for isolation exercises like hamstring curls, leg extensions, calf raises and the like, and it’s usually a natural consequence of pushing for progressive overload as opposed to deliberate programming.
Rest 3 to 4 minutes in between each set.
This will give your muscles enough time to fully recoup their strength so you can give maximum effort each set.
Once you hit the top of your rep range for one set, you move up in weight.
For instance, if you military press 135 pounds for 6 reps on your first set, you add 5 pounds to each side of the bar for your next set.
If, on the next set, you can get at least 4 reps with 145 pounds, that’s the new weight you work with until you can military press it for 6 reps, move up, and so forth.
If you get 3 or fewer reps, though, reduce the weight added by 5 pounds (140 pounds) and see how the next set goes. If you still get 3 reps or fewer, reduce the weight to the original 6-rep load and work with that until you can do two 6-rep sets with it, and then increase the weight on the bar.
12 Scientifically Proven Ways to Increase Your Military Press
No matter what you do with your diet and workout programming, you’re going to get stuck from time to time.
This is particularly true of a challenging, technical lift like the military press that primarily trains a small muscle group like the shoulders.
I wish this weren’t the case, but it simply gets harder and harder to gain muscle and strength as you inch your way toward your genetic potential, and the closer you get, the more you’re going to have to break through plateaus.
That’s where these 12 strategies come in. They’ll not only help you break out of ruts when you fall into them, they’ll help you from getting stuck in the first place.
Keep Learning Proper Form (And Stick to it Ruthlessly)
You really can’t overemphasize proper technique when it comes to military pressing.
It may look simple, but there’s a lot more going on than meets the eye, which is why even the world’s best weightlifters are constantly playing with their grips, bar and foot positions, cues, and the rest of it to improve their performance.
This is also why many people who aren’t progressing on their military press can benefit from auditing their form.
Of course, step one would be going through the steps listed earlier in this article and making sure the fundamentals are in.
It’s also helpful to have a cheat sheet of sorts with cues that reinforce proper technique. Here’s mine:
- Squeeze your glutes.
- Throw the bar into the ceiling.
- Force your head under the bar.
- Push the floor apart with your feet.
- Show your armpits to the wall in front of you (weird, but it works).
It also helps tremendously to have someone video you military pressing from several angles and then compare your reps to a model, like the video shared earlier in this article.
Look closely at how you’re moving in each phase of your military press versus the model, make notes of what you see to be different, and work on improving them one at a time in the gym, on camera, until each becomes ingrained.
Improve Your Shoulder, Back, and Hip Mobility
Some people think they “just aren’t built for military pressing” because they can’t get their form right.
This is nonsense. With the right know-how and instruction, everybody who’s generally healthy and functional can military press with proper form.
The most common reason people believe otherwise is poor upper body mobility, and particularly shoulder and upper back mobility.
Hip mobility also plays a role as well, as you need to bend back at the hips for the bar to pass your face during the ascent.
If you want to learn how to improve your mobility for military pressing, check out these articles:
How to Improve Shoulder Flexibility and Mobility
Why Your Hip Flexors Are So Tight (and What to Do About It)
Learn to Brace Properly
“Bracing” refers to creating and maintaining tightness in your body while performing an exercise.
In weightlifting circles, this generally refers to how well you can trap air in your torso and hold it in under heavy loads.
This creates what’s known as intra-abdominal pressure, which helps stabilize your body, keep your torso rigid, and prevent your upper body from shifting out of position when you’re military pressing.
The bottom line is you should be holding your breath during heavy pressing exercises, and if you aren’t, then you aren’t going to be able to lift as much weight.
So, how do you brace properly?
Simple:
Every one to two reps, take in a breath that fills your lungs to about 80% of their maximum capacity, drawing the air deep into your stomach, press your tongue against the roof of your mouth, and don’t let that air out until you’re past the hardest part of the lift.
For most people, this will be when the bar is over your head during the military press.
If you want to learn more about proper bracing and breathing while lifting, check this out:
The Complete Guide to the Valsalva Maneuver
Lift Heavy Ass Weight
Professor Ronnie Coleman said it best:
There’s a never-ending debate as to the “ideal” rep range for building muscle, but there’s little argument about the fact that heavy lifting is best for getting stronger.
How heavy is “heavy,” though?
Well, the “strength” spectrum usually starts around 80 to 85% of your one-rep max (1RM), or the 4-to-6-rep range, and goes up and down, respectively, from there (up in weight, down in reps).
What this means is if you’re currently doing the majority of your military pressing with lighter weights—65 to 70% of 1RM for 10 to 12 reps, for example—you’re going to benefit greatly by emphasizing heavier lifting instead (80 to 85% of 1RM for 4 to 6 reps).
You don’t have to stop the 10- to 12-rep work, but don’t neglect the lower rep ranges that help you get stronger faster.
Want to learn more about the right rep range, intensity, and volume for strength training? Check out this article:
The 12 Best Science-Based Strength Training Programs for Gaining Muscle and Strength
Use the Right Equipment
Aside from a barbell and squat rack or military press station, you don’t need any special toys to military press properly.
If you want to get the most out of your pressing workouts, though, then there are a few pieces of equipment that may help you.
Weightlifting Shoes
What do most people lift weights in?
Running shoes. Perhaps the worst choice for heavy lifting for three reasons:
- Their squishy soles allow your feet to wiggle and shift under heavy loads, forcing you to waste precious energy stabilizing yourself that could be spent on, you know, pressing.
- Their fragile sidewalls also stretch (and sometimes tear) when you torque your feet against them.
- Their flimsy laces also don’t hold your feet in the proper position.
That’s why I highly recommend you pick up a pair of good weightlifting shoes.
They provide a stable, hard surface to help with balance, which is particularly important with exercises like the back and front squat, deadlift, and military press.
They provide a snug fit that keeps your feet from wiggling around, which saves energy and even helps prevent injury, and allows you to safely “screw” your feet into the ground (a good cue to help maintain lower body tightness during the military press).
And they provide good traction so your feet don’t slip or shift during a lift.
The bottom line is the right weightlifting shoes not only improve your performance of important lifts like the military press, but they reduce the risk of injury as well.
If you don’t feel like getting or using a pair of squat shoes for military pressing, I recommend you at least get a pair of shoes with a relatively firm, thin sole that won’t deform under pressure, like the F-Lite 235 V2 from Innov-8 (what I currently wear).
Check out this article to learn more about weightlifting shoes and my personal recommendations:
The Minimalist’s Guide to the Best Shoes for Weightlifting
Wrist Wraps
Wrist wraps are thick strips of nylon or canvas cloth that wrap around the wrist.
Some people find that wrist wraps help stabilize their wrists when military pressing, but I’ve never found a need for them.
If you want to give them a shot, though, they might help take some of the stress off of your wrists when pressing.
Here’s a good pair:
Weightlifting Belt
Multiple studies have shown that a weightlifting belt can improve your performance on key exercises like the squat and deadlift, but it probably doesn’t reduce your risk of injury.
Whether or not it helps improve your performance on a lift like the military press is up for debate, but most experienced lifters swear buy it.
A weightlifting belt works by helping you create more intra-abdominal pressure, and this is likely helpful on most lifts, so it stands to reason that it might give your military press a slight boost.
I’ve spent long periods of time military pressing with and without a belt and can vouch for the same. When used properly, you’re stronger with a belt. Period.
As whole-body strength is closely related with muscularity (the stronger you get, the bigger you get, generally speaking), a weightlifting belt can help you gain muscle faster over the long haul.
If you want to learn more about the pros and cons of lifting belts, then check out this article:
5 Studies Answer: Should You Use a Weightlifting Belt?
And here’s my favorite weightlifting belt:
Inzer Advance Designs Forever Lever Belt 10MM
Get in the Right State of Mind
The right mental preparation can make a significant difference in all of your weightlifting.
Don’t approach a set lethargically. Get pumped up and excited (the right music can help a lot).
Research shows that doing this can increase force production, and the same study also found that distraction can significantly decrease force production.
So, before you start your set, put your headphones on, tune out your mind and the rest of the gym, and pump yourself up.
Another simple but effective mental “trick” for increasing strength is visualizing successfully performing your reps before you do them.
I know, I know—it sounds woo-woo but research shows it actually works. Check out this article to learn more:
The Absolute Easiest Way to Get Stronger (Immediately!)
Lift Explosively
Many trainers and coaches promote super-slow reps as best for building muscle and strength, but research shows the opposite is actually better.
- A study conducted by scientists at the University of Sydney found that subjects following traditional “fast” training on the bench press gained more strength than slow training.
- A study conducted by researchers at the University of Connecticut found that very-slow training resulted in lower levels of peak force and power when compared with a normal, self-regulated tempo.
- A study conducted by scientists at the University of Wisconsin found that even in untrained individuals a traditional training tempo resulted in greater strength in the squat and greater peak power in the countermovement jump.
- A study conducted by researchers at the University of Oklahoma found that four weeks of traditional resistance training was more effective for increasing strength than super-slow training.
Furthermore, research shows that, when bench pressing, lowering the bar quickly (1 second) and, without pause, then exploding it upward results in greater power gains than a slow descent followed by a pause and explosive ascent.
(FYI, most of this type of research has been done on the bench press because it’s easier to find study subjects who know how to bench properly. All of the same rules apply to the military press.)
So, don’t slowly raise and lower the bar when military pressing. Explode that bar off your chest as fast as you can while still safely controlling the bar.
Military Press More Frequently
The ideal training frequency for building muscle is a heated subject. What we can know for certain, though, is this:
If you want to get better at something, you want to do it more frequently.
This applies to pretty much everything, including military pressing. The more you military press, the faster you’re going to improve your technique, which will translate into faster muscle and strength gain.
This is why every strength training program worth a hoot has you squatting, deadlifting, and/or bench or military pressing several times per week.
Many bodybuilding/”aesthetic” programs, like my Bigger Leaner Stronger (men) and Thinner Leaner Stronger (women), do as well.
So, if you’re currently military pressing once per week and are stuck, increasing frequency to pressing twice or even three times per week can be enough to break you out of the rut.
Keep in mind, however, that the more frequently you do an exercise—and especially a whole-body exercise like the military press—the easier it is to run into symptoms related to overtraining.
Check out this article for an effective workout routine that involves several pressing sessions per week (just replace the bench press with military press and you’re good to go):
3 Science-Based Chest Workouts for More Hypertrophy, Power, and Strength
Try Different Kinds of Military Presses
Changing your exercises too frequently can hurt your progress because you’re having to constantly learn new movements and reacquaint yourself with old ones.
Generally speaking, focusing most of your efforts on getting really good at fewer exercises is going to pay better dividends over time.
That said, pounding away at the exact same exercises for months or years on end can also be counterproductive.
As you learned earlier, different kinds of military presses challenge your body in different ways, and therefore rotating through them systematically can help you keep progressing.
For example, let’s say you’ve been doing standing military press for months and have hit a plateau.
Instead of continuing to grind away at it, you could switch to seated military press for 8 to 12 weeks to improve your shoulder and triceps strength, and then return to standing military press and find it stronger than before.
Personally, I like to change my main compound movements roughly every 8 to 12 weeks, depending on what I’m doing with my diet and how things are going.
Make Sure You’re Eating Enough

Whenever someone complains about not gaining weight, size, or strength, my first suspicion is they’re not eating enough food. And I’m very often right.
Here’s a simple fact of muscle growth that many people don’t understand:
If you want to gain muscle and weight as quickly as possible, then you need to eat enough calories. If you don’t, you simply won’t gain much to speak of.
For example, I know that I need to eat somewhere between 3,300 and 3,600 calories per day to consistently gain weight. If that sounds like a lot of food to you, it is.
It only goes up from there, too. By the end of my lean bulks, I’m usually eating upward of 4,000 calories per day.
I can’t complain, though because I’ve seen much worse. I’ve worked with hundreds of “hardgainers” that couldn’t gain a single pound until their daily intake exceeded 4,000 to 4,500 calories per day, seven days per week (no missing meals on the weekends!).
So, the takeaway here is simple: increasing your calorie intake is an easy way to get your numbers, both weight and strength, moving up.
What you don’t want to do, however, is bludgeon yourself with a truckload of food every day. Get out of hand and you’re going to gain a lot of fat a lot faster than you’d like.
Here’s how to do it right:
The Best Way to Gain Muscle Without Getting Fat
“Microload” Your Weights
As a natural weightlifter, your number one goal should be increasing your whole-body strength over time.
So long as you make that your primary focus in your training, you’ll have no trouble gaining the size you want.
The reason for this is while you can gain a fair amount of muscle in the beginning without gaining much strength, once you graduate to an intermediate lifter, strength and size become closely correlated.
In other words, once your “honeymoon phase” is over and your body is no longer hyper-responsive to resistance training, you’re going to have to get a lot stronger if you want to continue getting bigger.
This process is generally pretty straightforward:
You work in a given rep range until you hit the top for one, two, or three sets, and then you add weight to the bar, and usually 5 pounds to each side (or per dumbbell if it’s not a barbell exercise), and work with that until you can move up again, and so on.
Sometimes this doesn’t work, though, and you find yourself stuck at a given weight and rep count for several weeks. This is where “microloading” can help, which is a fancy term for adding less than 5 pounds to the bar.
For example, let’s say you’re following a strength training program that dictates 3 sets of 5 reps before adding weight to the bar, and you’ve been stuck at 5 x 5 x 4 for several weeks now. You’ve tried moving up 10 pounds anyway, but can only get 2 reps with good form.
In this case, you can use smaller (“fractional”) plates to increase the weight on the bar by just 5 or even 2.5 pounds, which may allow you to get the reps you need.
So, let’s say you increase the weight by just 2.5 pounds (227.5 total pounds) and get 4 reps. You can now work with this weight until you can squat it for three sets of 5 reps, and then add another 2.5 pounds to the bar (230 total pounds), work with it until you can move up, and so forth.
Here are some high-quality fractional plates I recommend:
Ader Fitness Olympic Fractional Microplates
Strengthen Your Shoulders and Triceps
Although the military press is one of the best exercises for strengthening your shoulders and triceps, you’ll eventually reach a point where doing even more for your shoulders and triceps will benefit your military press numbers.
As far as the shoulders, my favorite exercises to do in addition to the military press are:
- Dumbbell side raises
- Dumbbell front raises
- Dumbbell rear delt raises
And for the triceps, I like:
- Close-grip bench press
- Cable triceps overhead press with rope
- Weighted dip
The Bottom Line on the Military Press
The military press is one of the single best exercises you can do for developing your upper body, and especially for building big, strong, well-defined shoulders.
It’s not an easy lift, though.
Learning proper form can take weeks, getting good at it can take months, and mastering it under heavy loads can take years.
The good news is the rewards are worth the work, though, because building a strong military press will go far in getting you the upper body you really want.
No matter what you do in the way of programming and training, you’re going to hit sticking points along the way.
When you do, work your way through the 12 tips shared earlier to break through plateaus and keep building those shoulders:
- Keep Learning Proper Form (And Stick to it Ruthlessly)
- Improve Your Shoulder, Back, and Hip Mobility
- Learn to Brace Properly
- Lift Heavy Ass Weight
- Use the Right Equipment
- Get in the Right State of Mind
- Lift Explosively
- Military Press More Frequently
- Try Different Kinds of Military Presses
- Make Sure You’re Eating Enough
- “Microload” Your Weights
- Strengthen Your Shoulders and Triceps
Happy military pressing!
P.S. Would you mind doing me a favor? I love researching and writing these articles, and the more they get shared around, the more I’m encouraged to write. 🙂
So if you enjoyed this, would you share it on Facebook and Twitter?
It really helps spread the word! Thanks!
What’s your take on the military press? Have anything else to share? Let me know in the comments below!
+ Scientific References
- Pryo RR, Sforz GA, Kin DL. Optimizing power output by varying repetition tempo. J Strength Cond Res. 2011;25(11):3029-3034. doi:10.1519/JSC.0b013e31820f50cb
- Ki E, Dea A, Ferguso SL, Se D, Bembe MG. Effects of 4 weeks of traditional resistance training vs. superslow strength training on early phase adaptations in strength, flexibility, and aerobic capacity in college-aged women. J Strength Cond Res. 2011;25(11):3006-3013. doi:10.1519/JSC.0b013e318212e3a2
- Neils CM, Udermann BE, Brice GA, Winchester JB, McGuigan MR. Influence of contraction velocity in untrained individuals over the initial early phase of resistance training. J Strength Cond Res. 2005;19(4):883-887. doi:10.1519/R-15794.1
- Hatfield DL, Kraemer WJ, Spiering BA, et al. The impact of velocity of movement on performance factors in resistance exercise. J Strength Cond Res. 2006;20(4):760-766. doi:10.1519/R-155552.1
- Munn J, Herbert RD, Hancock MJ, Gandevia SC. Resistance training for strength: Effect of number of sets and contraction speed. Med Sci Sports Exerc. 2005;37(9):1622-1626. doi:10.1249/01.mss.0000177583.41245.f8
- Richter J, Gilbert JN, Baldis M. Maximizing Strength Training Performance Using Mental Imagery. Strength Cond J. 2012;34(5):65-69. doi:10.1519/SSC.0b013e3182668c3d
- Argus CK, Gill ND, Keogh JWL, Hopkins WG. Acute effects of verbal feedback on upper-body performance in elite athletes. J Strength Cond Res. 2011;25(12):3282-3287. doi:10.1519/JSC.0b013e3182133b8c
- Lander JE, Hundley JR, Leslie Simonton R. The effectiveness of weight-belts during multiple repetitions of the squat exercise. Med Sci Sports Exerc. 1992;24(5 SUPPL.):603-609. doi:10.1249/00005768-199205000-00015
- Harman EA, Rosenstein RM, Frykman PN, Nigro GA. Effects of a belt on intra-abdominal pressure during weight lifting. Med Sci Sports Exerc. 1989;21(2):186-190. doi:10.1249/00005768-198904000-00012
- Sato K, Fortenbaugh D, Hydock DS. Kinematic changes using weightlifting shoes on barbell back squat. J Strength Cond Res. 2012;26(1):28-33. doi:10.1519/JSC.0b013e318218dd64
- Campos GER, Luecke TJ, Wendeln HK, et al. Muscular adaptations in response to three different resistance-training regimens: Specificity of repetition maximum training zones. Eur J Appl Physiol. 2002;88(1-2):50-60. doi:10.1007/s00421-002-0681-6
- Schwanbeck S, Chilibeck PD, Binsted G. A comparison of free weight squat to Smith machine squat using electromyography. J Strength Cond Res. 2009;23(9):2588-2591. doi:10.1519/JSC.0b013e3181b1b181
- Schick EE, Coburn JW, Brown LE, et al. A comparison of muscle activation between a Smith machine and free weight bench press. J Strength Cond Res. 2010;24(3):779-784. doi:10.1519/JSC.0b013e3181cc2237
- Saeterbakken AH, Fimland MS. Effects of body position and loading modality on muscle activity and strength in shoulder presses. J Strength Cond Res. 2013;27(7):1824-1831. doi:10.1519/JSC.0b013e318276b873
- Kroell J, Mike J. Exploring the standing barbell overhead press. Strength Cond J. 2017;39(6):70-75. doi:10.1519/SSC.0000000000000324